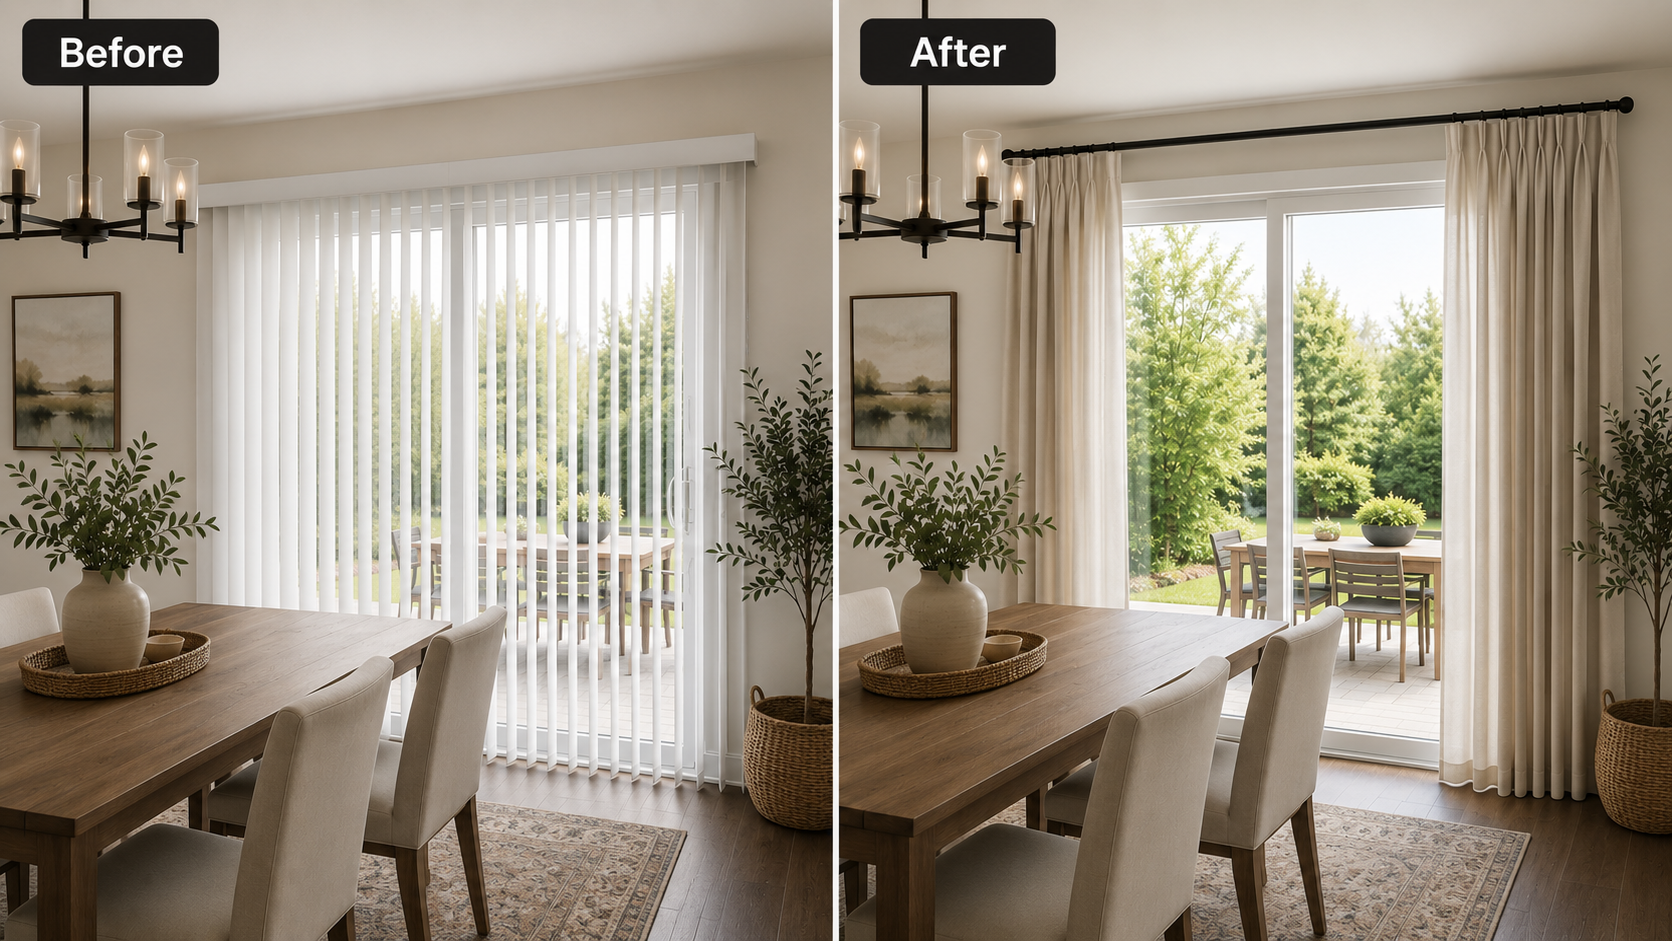
NoNo Bracket FAQs: Hanging Curtains Over Blinds Without Drilling
Find answers about choosing, measuring, installing, and using NoNo Brackets to hang curtains over existing vertical, mini, or faux-wood blinds—without drilling holes or damaging your walls.
Which NoNo Brackets Do I Need?
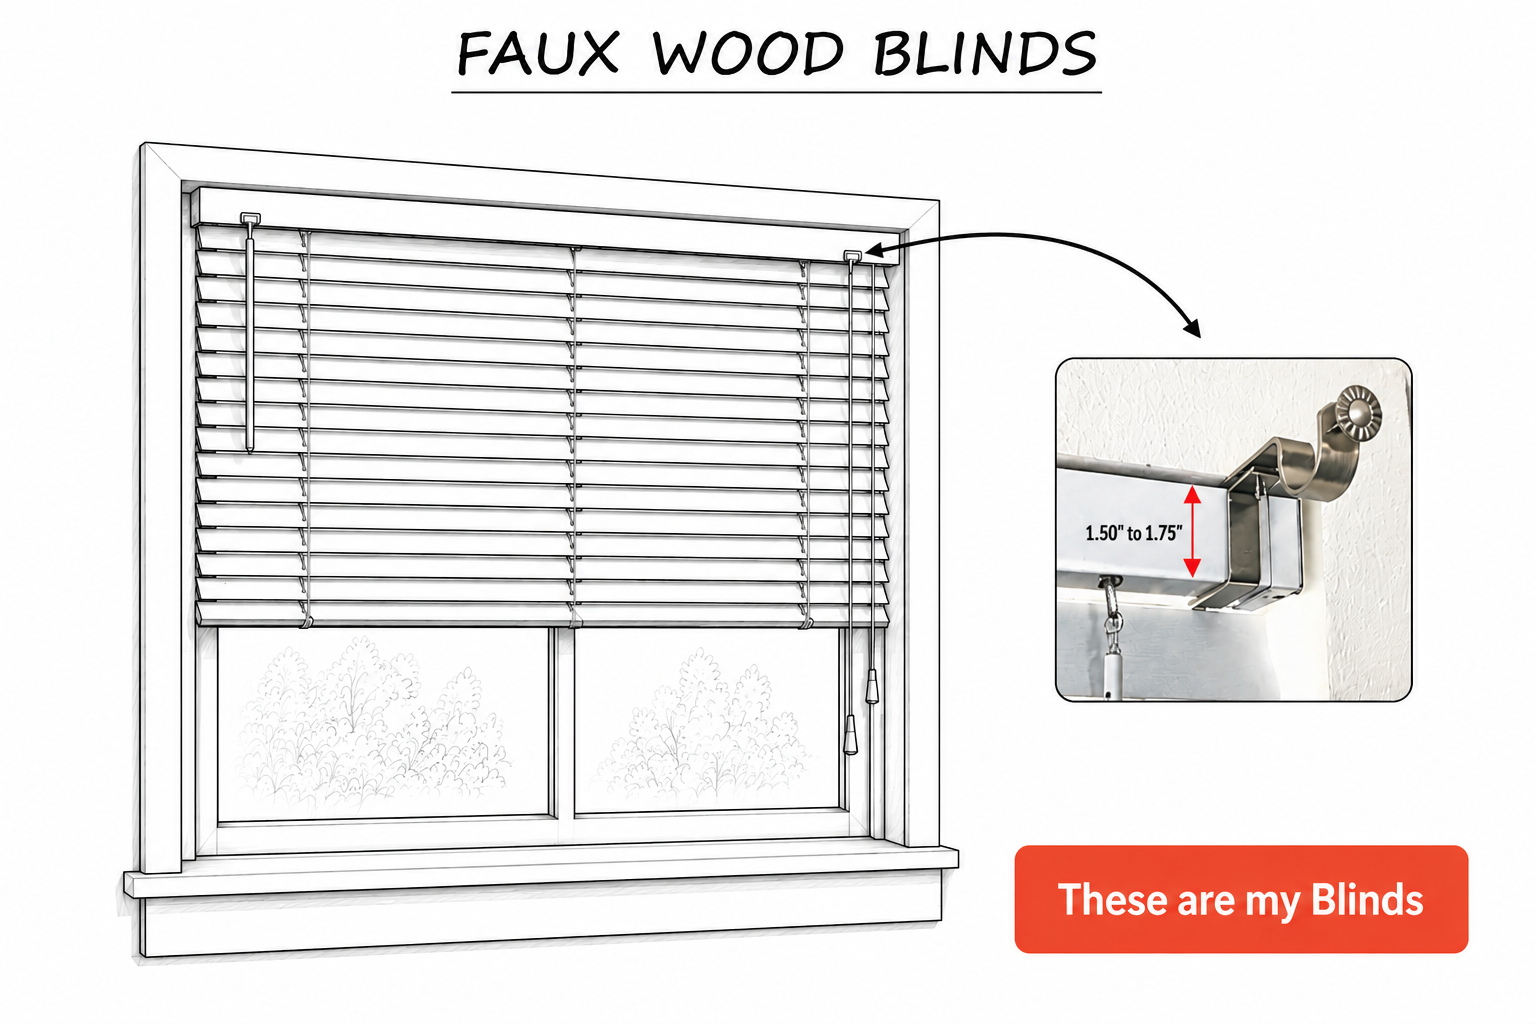

Which NoNo Bracket Do I Need?
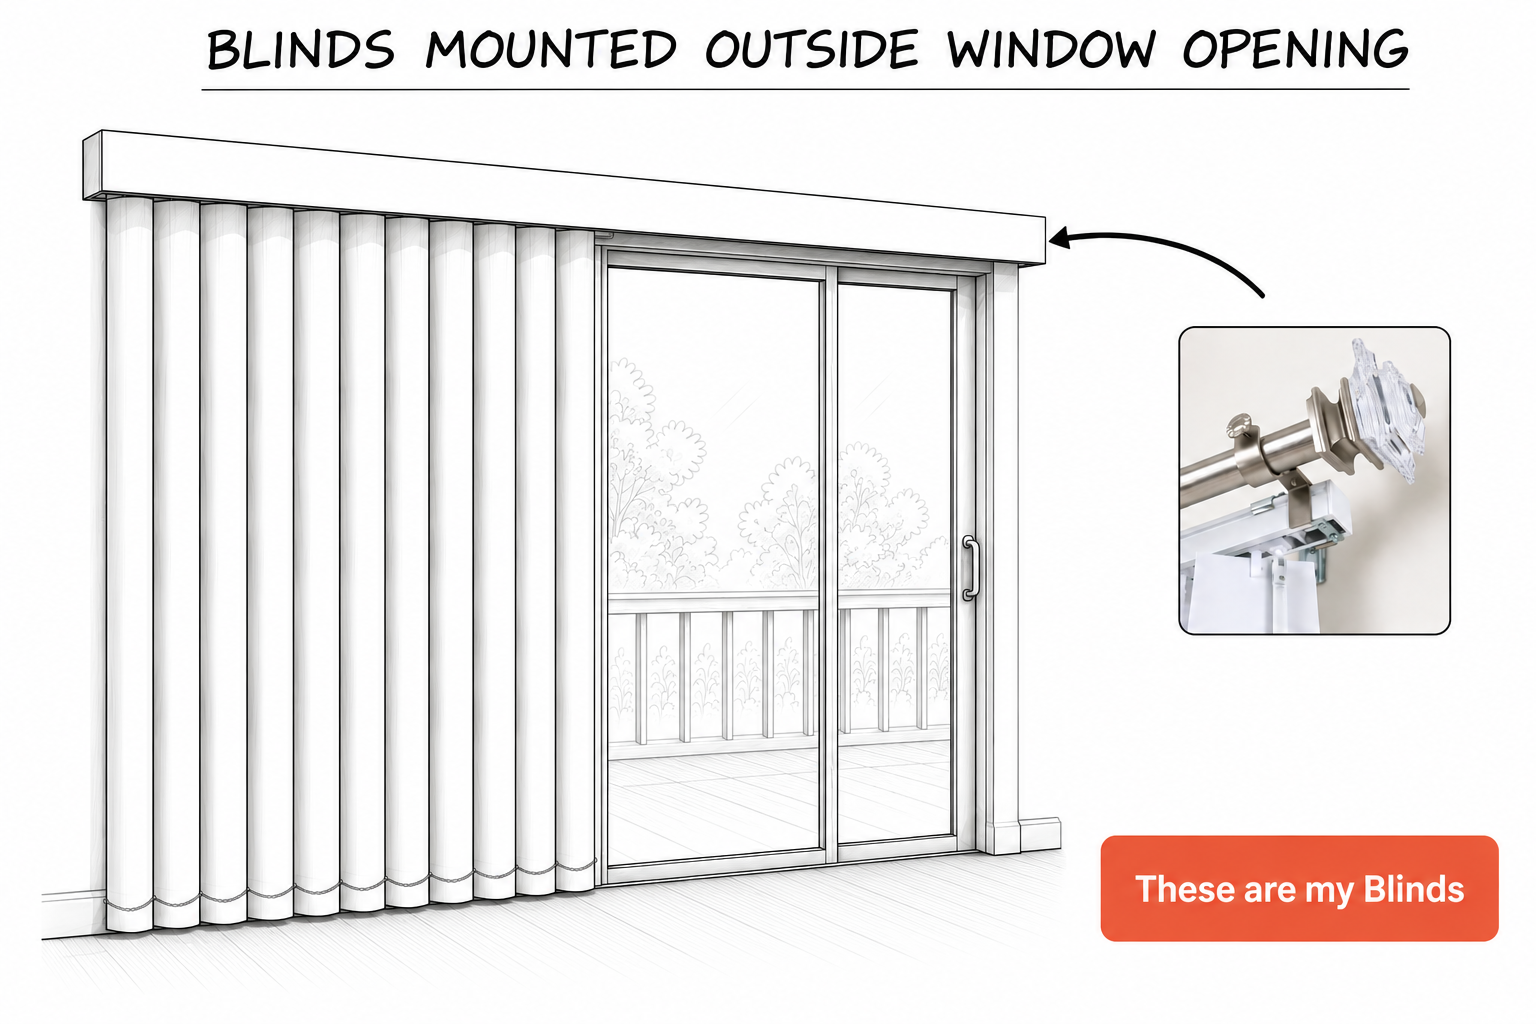
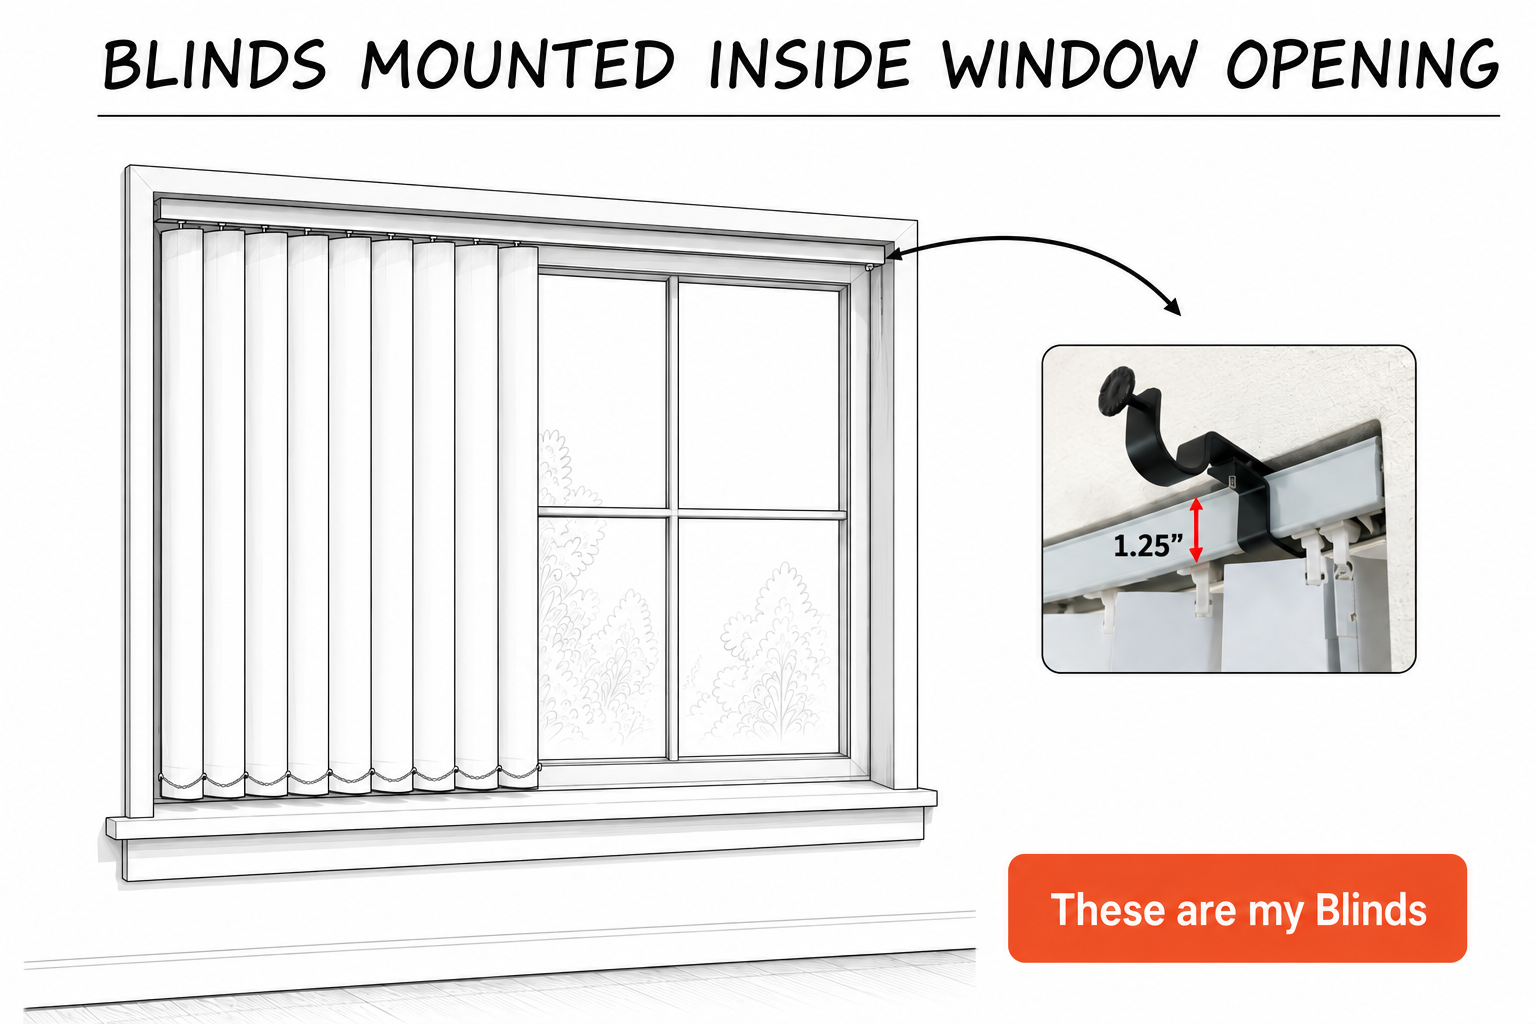
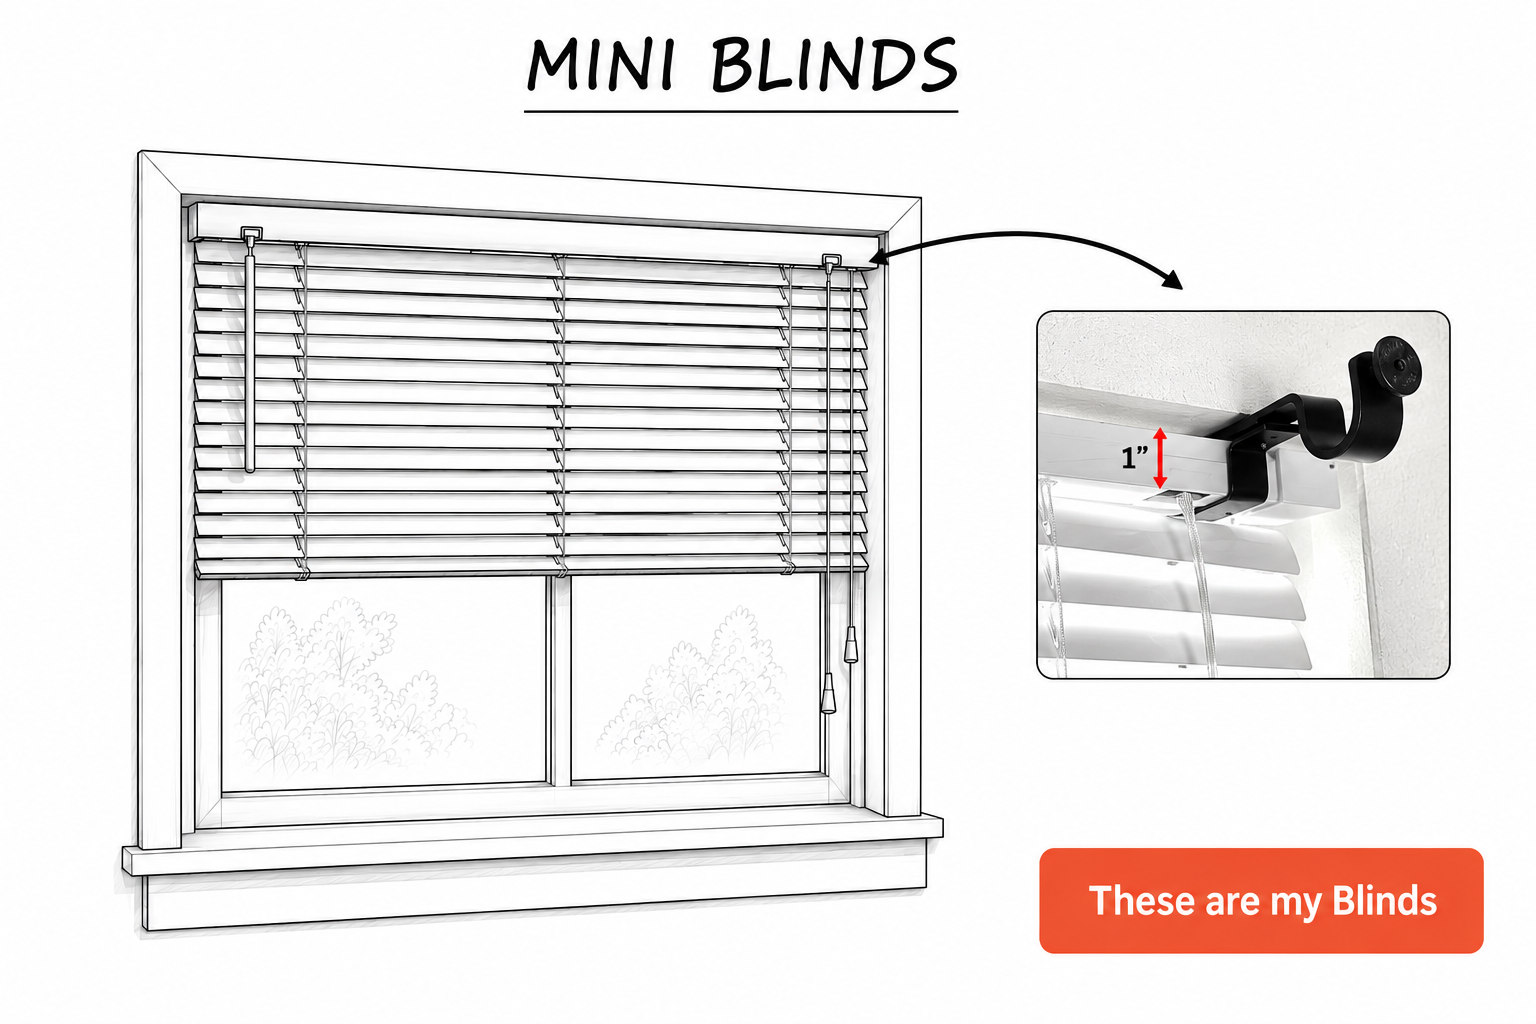
NoNo Brackets are available in four styles. The correct bracket depends on how your existing blinds are mounted:
Outside Mount Brackets: For blinds installed on the wall or trim outside the window opening.
Inside Mount Brackets: For blinds installed inside the window opening.
XL Inside Mount Brackets: For larger inside-mounted headrails commonly found on faux-wood blinds.
Mini Inside Mount Brackets: For smaller headrails commonly found on mini blinds.
Compare your blind headrail with the images in our Buying Guide before ordering to make sure you select the correct NoNo Bracket.
Measuring Your Blind Headrail
Remove the decorative plastic blind valance, if present, before measuring the headrail itself.
Use 2 brackets for windows up to 5 feet (60 inches) wide.
Use 3 brackets for sliding glass doors or windows wider than 5 feet (60 inches).
Still unsure which brackets you need? View our Buying Guide or email us a photo of your blinds, and we’ll be happy to help you choose the correct style.
How much weight can NoNo Brackets hold?
The amount of weight NoNo Brackets can support depends primarily on how securely your existing blind headrail is installed. We have tested our brackets with blackout curtains for more than five years without damage to a properly secured headrail.
For best results, make sure the headrail is firmly attached and use the recommended number of brackets for your window width. Do not install NoNo Brackets on a headrail that is loose, damaged, or improperly mounted.
What Curtain Styles Work Best With NoNo Brackets?
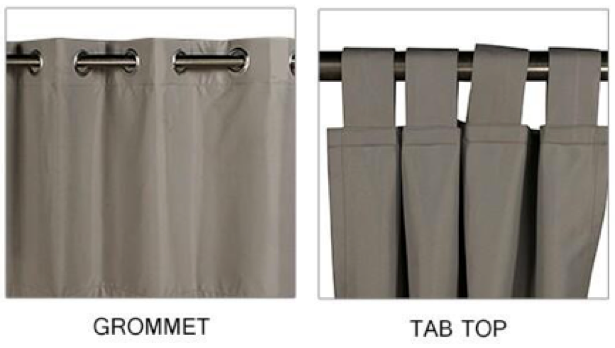
We recommend using grommet (eyelet) or tab-top curtains with NoNo Brackets. These styles allow the curtains to move easily along the rod and provide enough coverage to conceal the existing blind headrail or track.
We do not recommend rod-pocket curtains because they may not extend far enough across the curtain rod to fully cover the blind headrail.
International Shipping?
We ship anywhere within the United States and Canada. For other countries please visit our International shipping page. You can also email us at contactus@nonobracket.com for additional shipping information.
PS. All prices listed on our website are in USD. If you are ordering from outside the US, exchange rates are determined by your credit card company. The amount charged will be based on the exchange rate between USD and your country at the time of purchase.
Returns?
We have a 100% Money Back return policy within a 3 month period. If for some reason you need to return your brackets please Email us at contactus@nonobracket.comwith your full name or order number. We will respond with return instructions.
Shipping Times?
All orders ship within 1 - 3 Business days unless it is a pre-order or back order item. You will receive a shipping notification when your order ships.
Where else can I purchase NoNo Brackets?
Our products are currently only sold online here, Amazon, Walmart,Etsy, and Ebay.
Installation Instructions
Important: Ensure your existing blind head rail is securely fastened to the wall. Do not install if your head rail is loose or damaged in anyway.
Outside Mount Brackets:
1. Remove plastic valance if present. The valance is usually attached by plastic clips.
2. Add the double sided sticky strips (included) to any contact point of the brackets. This will prevent slippage.
3. Slide bracket into head rail and tighten center screw.
4. Hang curtain rod and curtains as normal.
Inside Mount Brackets (Standard, XL, or Mini):
1. Remove valance if present. The valance is typically held on with plastic clips.
2. Add the double sided sticky strips (included) to the inside bottom part of bracket arm. This will prevent slippage.
3. Adjust the center screw as necessary to ensure a tight fit to the head rail. Remove rubber washer if necessary for a tighter fit.
4. Slide bracket into head rail and further tighten the center screw.
5. Hang curtain rod and curtains as normal
Check out our YouTube Channel for demonstrations and customer videos.
If you have any questions or concerns please feel free to contact us. We'd love to hear your feedback and see pictures of your room transformation.